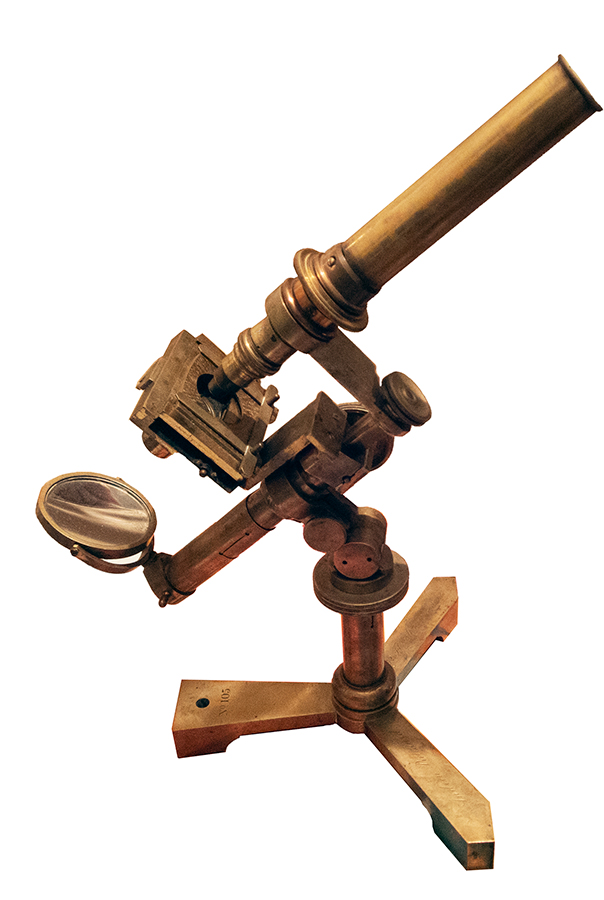
Andrew Pitchard, 162 Fleet Street, London. Microscope number 105.
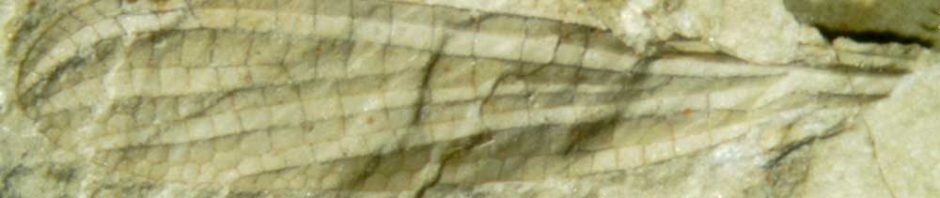
I was given this microscope (Pritchard's 'Achromatic engiscope) when I was about 12 by an elderly naturalist. Long before then I had an intense interest and curiosity in the natural world as well as mechanical things. It was the begining of my interest in microscopes. I made a camera attachment and took my first micrographs including one of a pseudoscorpion. Later purchased a binocular Watson Bactil that was my mainstay for years, even being used when I did my zoology and botany practical BSc exams up in London and going to Sierra Leone when I was lecturer in entomology at the University. Before going to Africa I gave it to my brother-in-law, a commercial beekeeper and ministry bee inspector. Years later he returned it to me saying that he'd not used it much as he had had difficulties.
The difficulties were soon apparent, the pinion cover plate had loosened over time resulting in the pinion gear grating over the teeth of the rack and as a result the rack wearing them away, fortunately no damage to the rack.
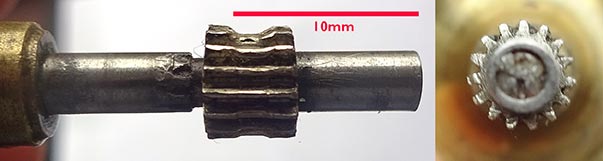
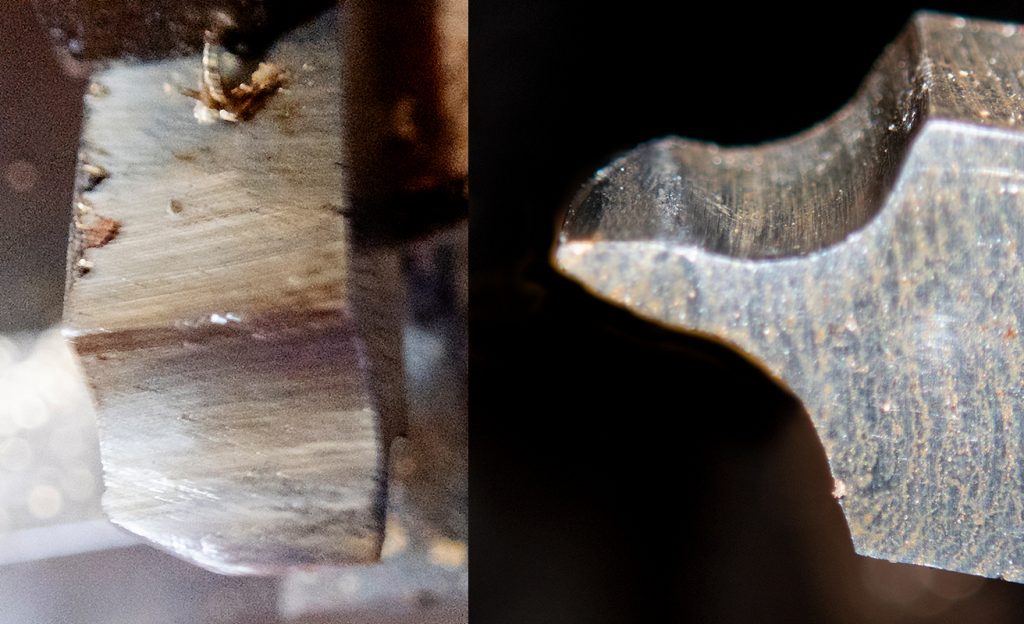
A new pinion needed. Unable to use a gear cutting wheel I decided to make it by broaching. A tool was ground with a tip to match to gear slots in the damaged pinion. Not an easy job and having to use my Nikon stereo!
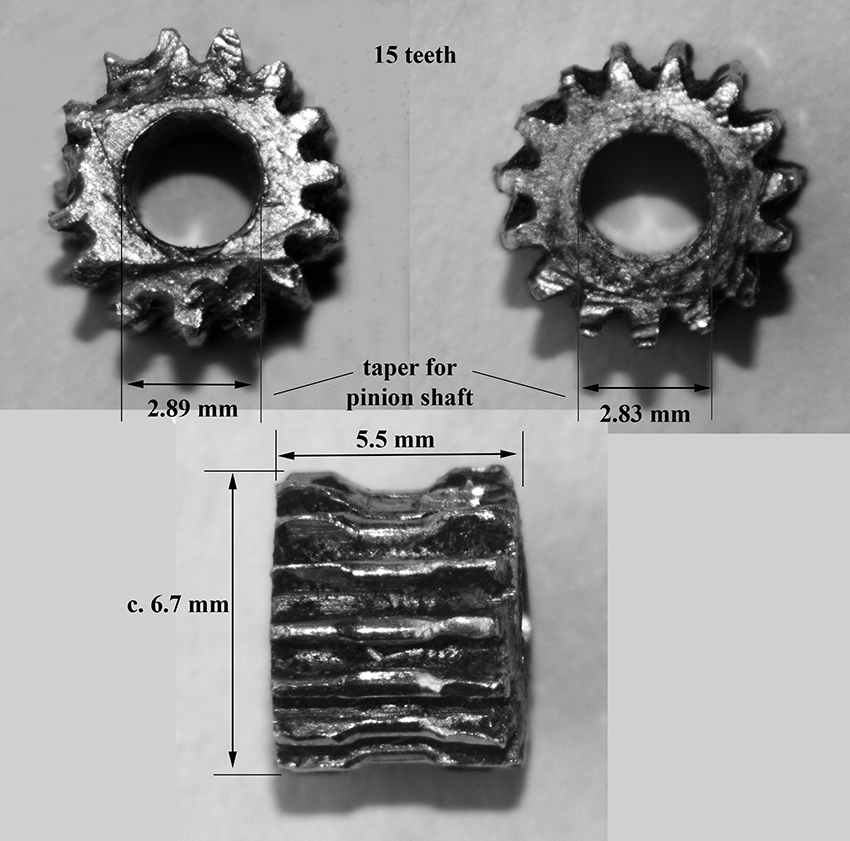
An 8mm brass rod was faced, countersunk and bored with a No. 32 drill (to fit the pinion shaft) and turned down to the diameter of the original pinion using my grandfather's lathe (ex WW2 surplus; used to make antiaircraft shells and other ordinance.
To act as a dividing-head the lathe chuck had a strip of paper marked into 15 segments, corresponding to the pinion gear, stuck around it, and a piece of fixed wire was fixed to act as a pointer. A long centre punch was used as a centre mounted in the tail-stock in order to support the rod as the cutter was forced along the rod. Each gear slot was progressively cut advancing to the required depth a few thou' at a time. The teeth were then carefully deburred to restore the correct diameter of the pinion and the pinion then parted-off.
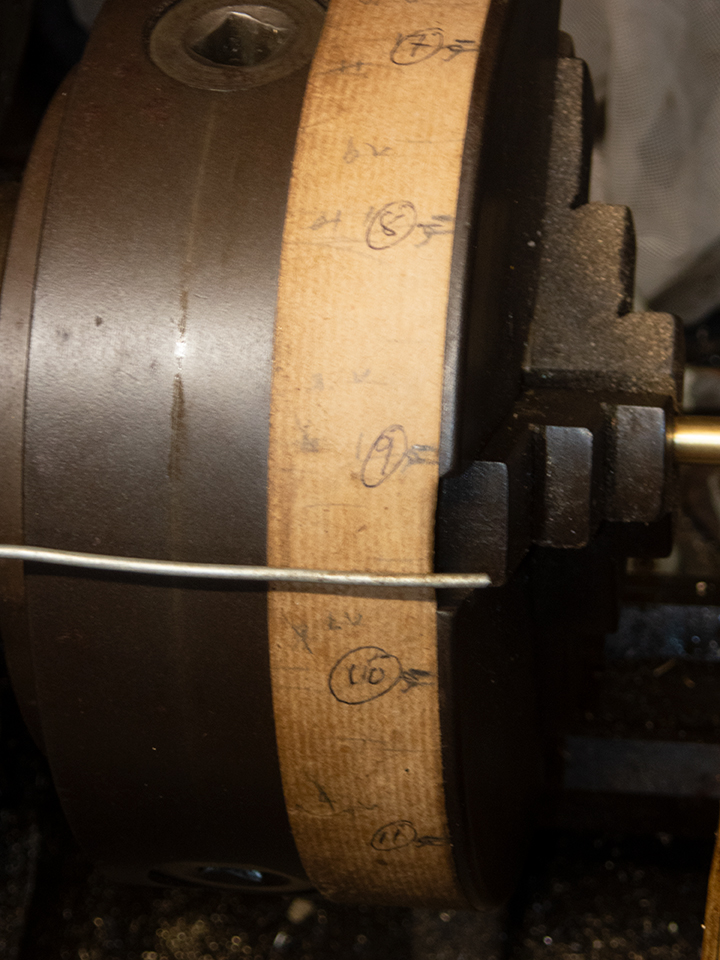
'Dividing head!'
Centre punch support.
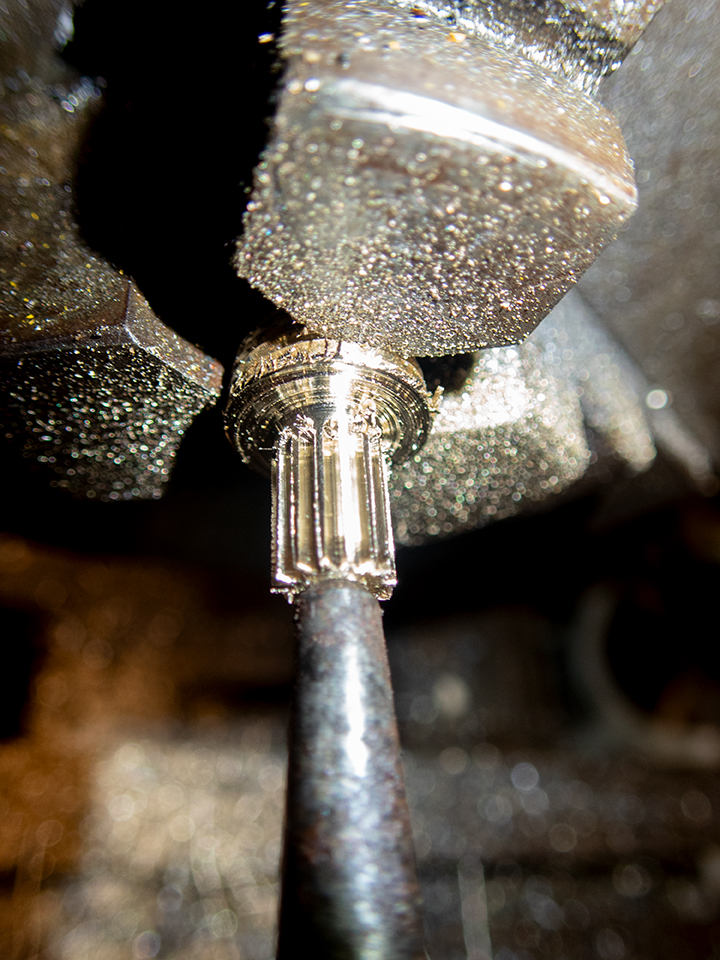
After parting-off; cut teeth on part of the bar and cutter in place.
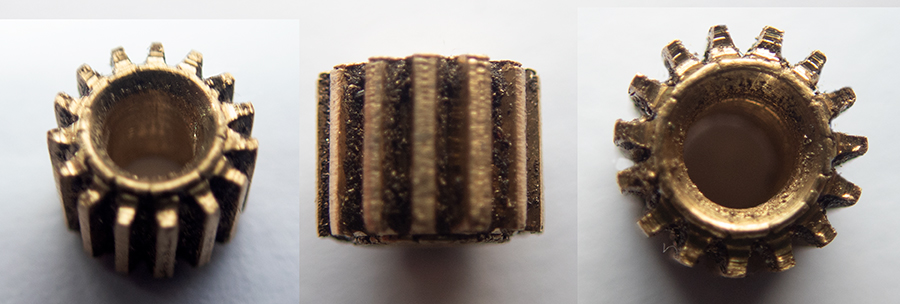
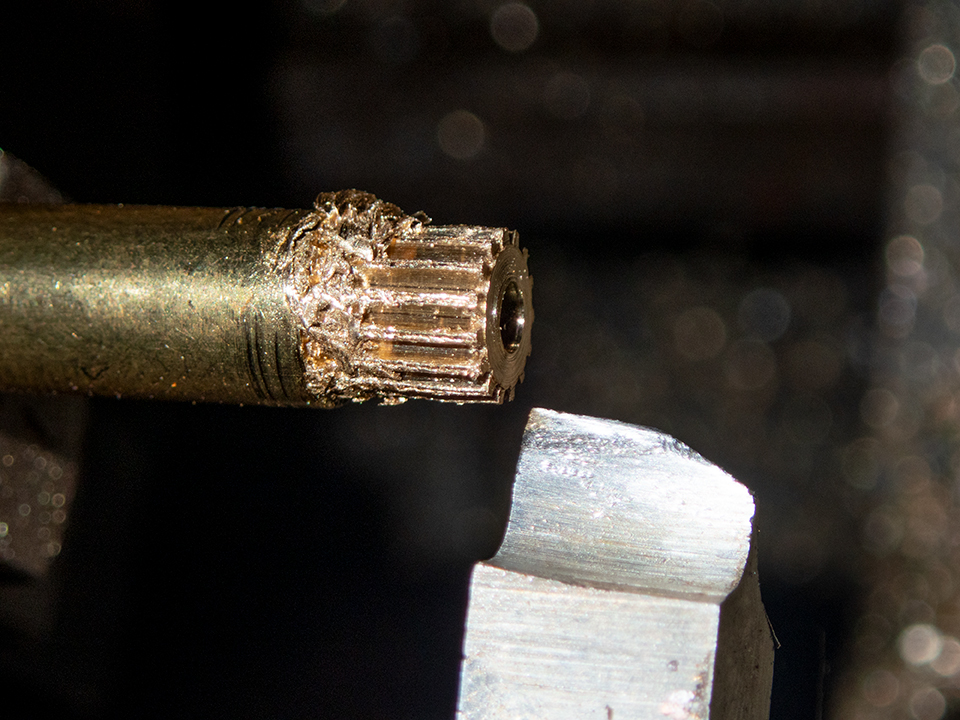
Pinion parted off ready to clean/finish.
The pinion's bore was carefully taper reamed using a jeweller's diamond tool such at it force fitted down the pinion's shaft onto its splines and the pinion assembly refitted to the body of the microscope.